Before start:
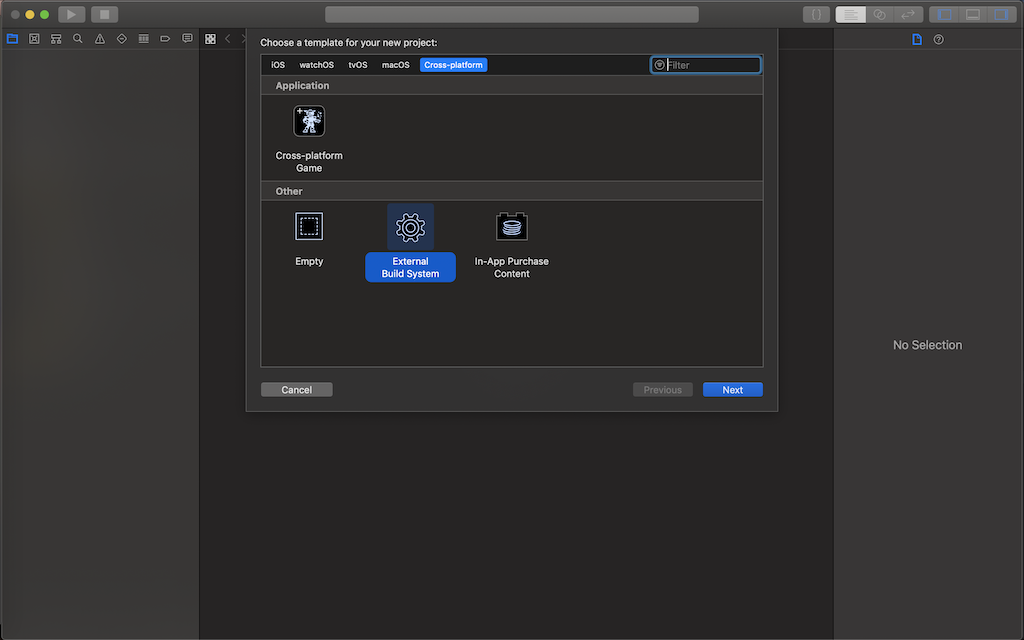
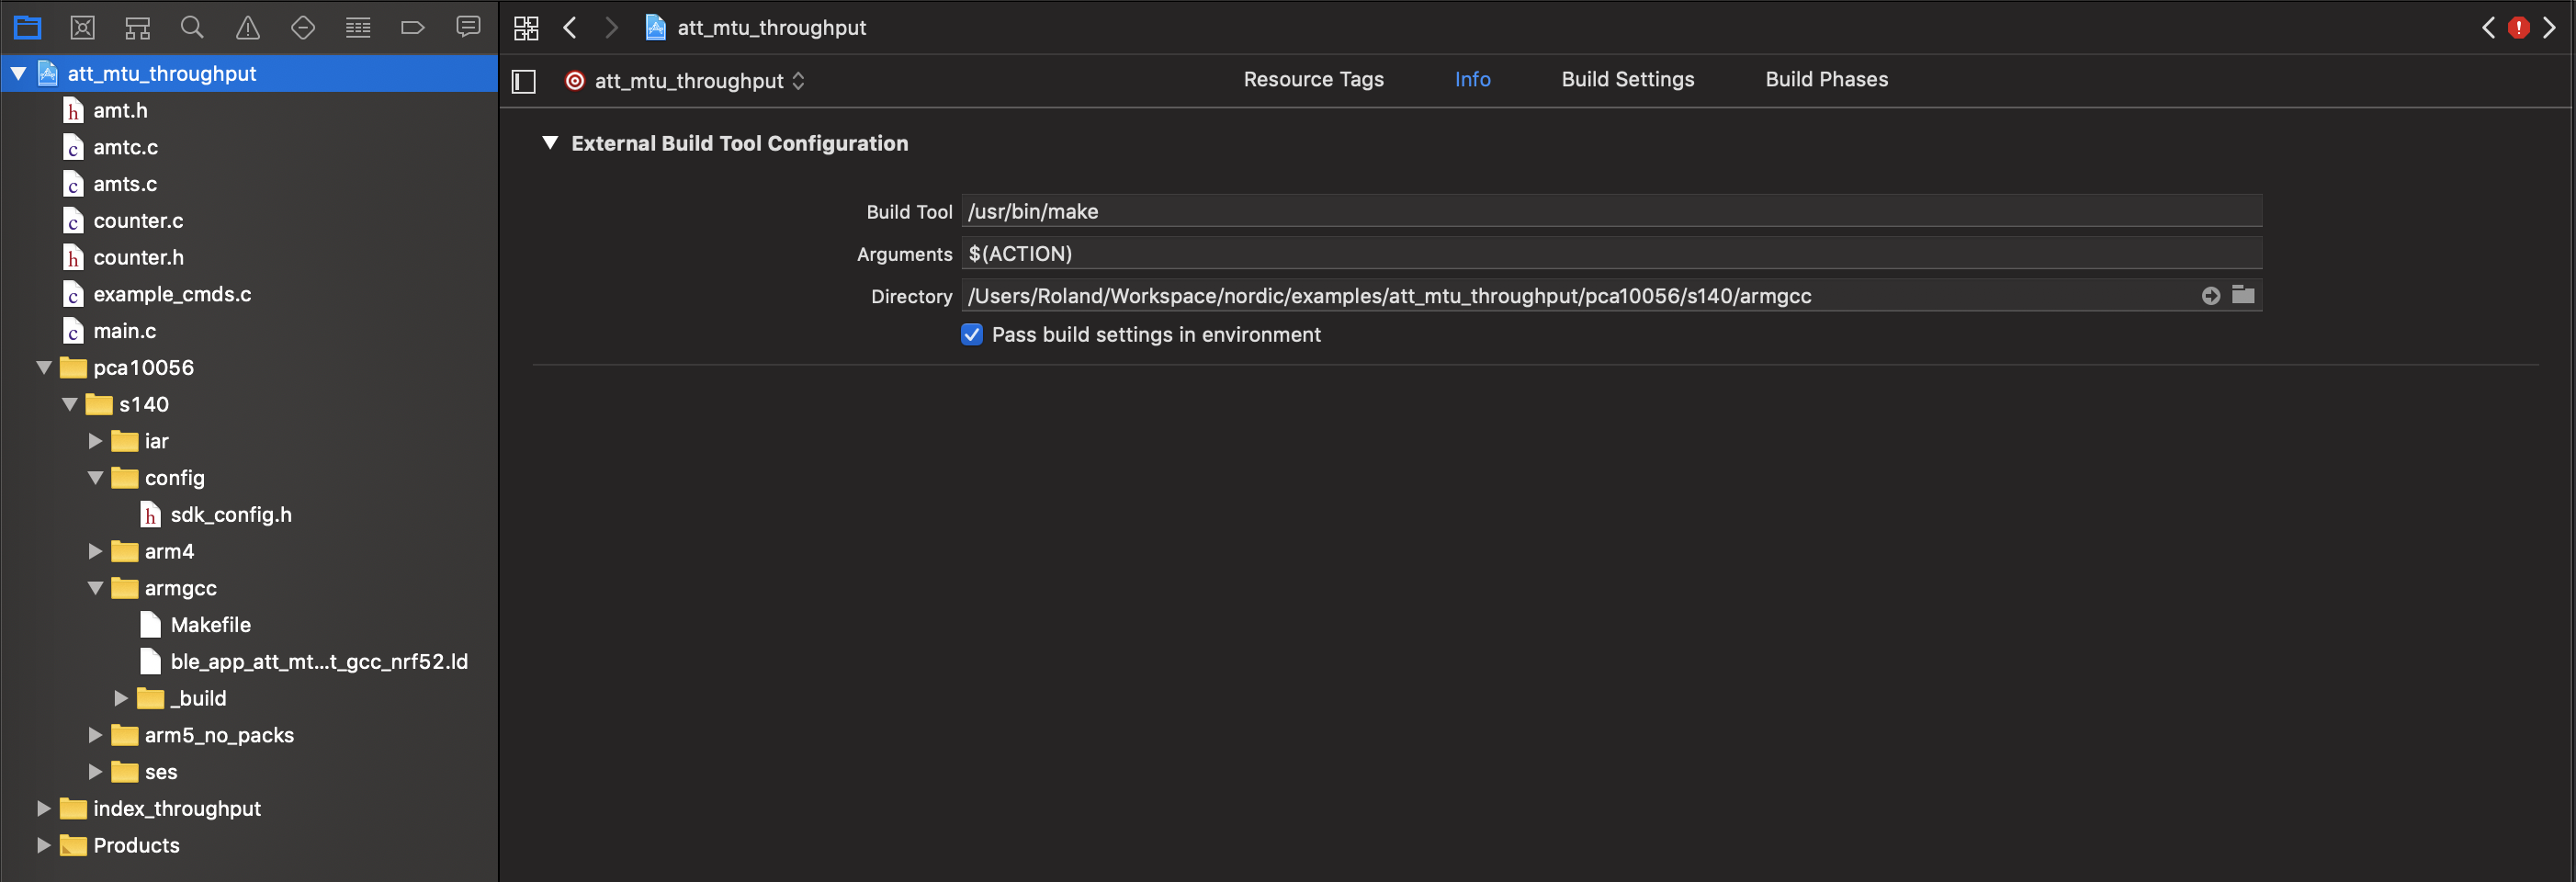
By default MacOS/Xcode use clang, not gcc. If you have a project needs to build using gcc, you can integrate the project into Xcode by using external build system.
Before start, you need to install gcc first. To do that, use brew, the recommended package manager on MacOS platform. Get brew installed by following their instructions.
Then install gcc using these commands:

brew update
brew upgrade
brew info gcc
brew install gcc
brew cleanup

The gcc application will be installed by default in /usr/local/bin.

    Now we can proceed with Xcode part.

    Step 1. Create an empty new project using external build system.

      Step 2. Drag your source file(s) into this empty project space. This basically accomplished major part of the task.
      Step 3. Before you can compile, you need to play with the project settings a bit. Select project name on the left pane, and click the "info" tab. On the "Directory" row select the path where your make file is located.

        You are done!
        This is what the "att_mtu_throughput" project looks like in Xcode. You can now build the project by clicking the "Build and run" button on the toolbar, just like any other Xcode projects.

          You can utilize this external builder support feature to achieve more advanced features combined with Xcode's multi-targets, scheme management and scripting functions. So those developers who already get used to Xcode environment do not need to move out their comfort zone.

            Write a Reply...